Why Beyond Paint?
Paint is one language. Clay, markers, printmaking, and mixed media are others. Each has different physics, different problem-solving, different visual outcomes. Mastery across mediums doesn't come from dabbling. It comes from understanding the material constraints and what those constraints let you do.
This post covers the essentials for each medium: what the material can do, where it fails, and how to build confidence through deliberate practice.
Clay: Types and What They're Actually For
Not all clay is the same. The type you choose determines your workflow, permanence, and what happens when you're done.
Air-dry clay is polymer-based (polymer resin, PVA). It doesn't cure through heat. You sculpt it, let it dry exposed to air for 24-72 hours, and it hardens chemically. It doesn't shrink much. It won't crack from drying faster than kiln-fired clay because there's no sudden heat stress.
Best for: quick projects, tabletop sculpture, detail work, student pieces, works that need to stay lightweight. Not food-safe. Water-based, so you can smooth it with a damp brush. Mistakes are hard to reverse once dry, so plan carefully.
Polymer clay (like Fimo, Sculpey) is PVC-based. You sculpt at room temperature, then bake it in a home oven at low temperature (around 130 degrees Celsius). It doesn't dry out while you work, so you have unlimited working time before baking. After baking, it's hard and stable. It's not ceramically fired, so it's less porous than kiln-fired clay.
Best for: miniatures, jewellery, figure work, commissions where you need perfect control, anything that benefits from fine detail and no time pressure. Can be re-baked if you're not happy. Not intended for food or drink (some brands are safer than others, but assume it's not food-safe unless explicitly stated). Colours stay consistent through baking.
Kiln-fired earthenware is traditional clay containing silicates. You sculpt it, let it dry slowly (24-48 hours minimum), then fire it in a kiln at high temperature (around 1100 degrees Celsius). The silicates fuse and chemically change. It becomes porous terracotta, which is sturdy but can absorb water. It can be glazed.
Best for: large sculptures, functional ware (bowls, cups, planters), work that needs permanence and can tolerate the firing process, anything needing food-safety certification (some glazes, once fired, are food-safe). Working time is limited because the piece must dry before firing. Mistakes in firing can't be undone. Cracking during kiln firing happens if the piece dries unevenly or is too thick.
Stoneware is kiln-fired like earthenware but at higher temperatures (around 1200-1300 degrees Celsius). The silicates vitrify and become non-porous. It's more durable and stronger than earthenware and can be food-safe once properly glazed and fired.
Best for: functional ware that needs food-safety, outdoor sculpture, anything that needs to withstand water and weather. Requires a kiln. Working process is identical to earthenware.
For beginning sculptors, start with air-dry or polymer clay. You control the drying, see results quickly, and don't need kiln access.
Hand-Building Methods
Whether you're using air-dry, polymer, or kiln-fired clay, three hand-building methods form the foundation.
Pinch method: Roll a ball of clay. Push your thumb into the centre. Gently squeeze and turn the clay between thumb and fingers, making the walls thinner as you rotate. This creates shallow bowls and forms. The advantage is directness—you feel the wall thickness as you work. The disadvantage is size limit; your hand can only reach so far, and the walls need to be thick enough to support themselves. Use for small vessels, faces, organic forms.
Coil method: Roll clay into long, even coils (thickness matters; thinner coils give you more control over form). Stack the coils on top of each other, bonding them as you go by scoring and slipping (see below). Build upward in spiral rings. This method lets you make large forms. The disadvantage is visible coil lines unless you compress them smooth, which takes effort.
Use for: large vessels, architectural forms, anything that benefits from height and control. The method is slower than wheel-throwing but doesn't require equipment.
Slab method: Roll clay flat using a rolling pin or slab roller, aiming for even thickness (quarter-inch for small forms, half-inch for larger pieces). Cut shapes using templates. Bend, fold, or attach slabs to make boxes, plates, architectural pieces. This method gives clean lines and flat planes.
Use for: geometric forms, vessels with defined edges, tiles, architectural elements, anything requiring flat surfaces. The challenge is preventing warping during drying (thinner pieces warp less) and keeping seams strong.
All three methods share one critical technique: scoring and slipping.
Scoring and slipping is how you bond clay to clay permanently. Where two pieces meet, you score (scratch) both surfaces with a fork or knife to create mechanical grip. Then you apply slip, which is clay mixed with water into a paste-like consistency. Slip acts as glue. Press the scored pieces together firmly and hold for a few seconds. Without scoring and slipping, seams will crack as the clay dries because the pieces dry at different rates and pull apart.
This is non-negotiable. Skip it, and your form will split at every seam.
Troubleshooting Cracks
Cracks happen for two reasons: uneven drying and uneven wall thickness.
Uneven drying: covers are your tool. Once you're happy with the form, wrap it loosely in plastic. Leave it wrapped for 12-24 hours. This slows drying and lets moisture distribute evenly. If one side dries faster than the other, that side shrinks faster, and the stress cracks the piece.
Thicker pieces need slower drying. A hand-built vessel two inches thick might need 48 hours under cover. A one-inch piece needs 24. Too-thin pieces (quarter-inch walls) are fragile and crack easily; aim for at least half-inch walls.
Uneven wall thickness: means some parts are thick (slow-drying) and some are thin (fast-drying). The thin parts shrink first and crack. Use calipers or mark a target thickness with a tool. When pinching, compress from both sides to keep walls even. When coiling, use coils of consistent thickness. When slabbing, use a slab roller set to a specific thickness.
If cracks happen after drying but before firing, you can sometimes repair them for air-dry and polymer clay. Score the crack, apply slip (or for polymer clay, a small amount of new clay), and smooth it. For kiln-fired clay, repairs made before firing sometimes survive the kiln and sometimes don't; it's a gamble.
Markers: Water-Based vs Alcohol-Based
Markers aren't just markers. The solvent base changes how they behave.
Water-based markers use water as the solvent. The pigment is suspended in the water-pigment mixture. They're less toxic, more blendable on porous surfaces (paper absorbs water), and can't blend on non-porous surfaces (the pigment sits on top). They fade faster than alcohol-based markers under UV exposure. They work well on paper, cardboard, and fabric.
Blending technique for water-based: use two markers of different colours. Mark one colour, then immediately mark the second colour adjacent to the first, while the paper is still damp. The water carries the pigments together, creating a blend. Speed matters—if you wait and the paper dries, blending doesn't happen.
Best for: sketchbooks, illustration on paper, classroom use, low-toxicity projects, any application where water-solubility is an advantage (you can erase with water or wet brush).
Alcohol-based markers use alcohol as the solvent. The pigment is suspended in alcohol, which evaporates faster than water. Alcohol dissolves into non-porous surfaces, so the pigment can be blended on plastic, glass, and non-porous paper. They're brighter and more lightfast than water-based markers. They're more toxic and require ventilation.
Blending technique for alcohol-based: you can blend on the surface using two colours before either dries, or you can layer colours. The second colour's solvent reactivates the first colour's pigment slightly, allowing blending. This works on paper and non-porous surfaces.
Best for: design work, professional illustration, markers on synthetics, artwork needing durability and lightfastness, any application requiring fine control over blending.
Choose based on surface and permanence needs. Water-based on paper; alcohol-based when you need non-porous surface blending or UV resistance.

Printmaking Basics
Printmaking intimidates because it feels technical. It's not. It's mechanical reproduction of a mark.
Relief printing is the simplest method. You carve away material from a block (linoleum, wood, rubber), leaving a raised surface. You ink the raised surface and press it onto paper. What prints is what's raised; what you carved away doesn't print.
Process: design on paper, transfer it to the block, carve, ink using a roller, press paper on top using a baren (hand tool) or spoon, peel back the paper. The carved lines appear white; the uncarved surface appears as the ink colour.
Best for: bold graphic designs, high contrast images, repeatable prints, small-scale work. The limitation is detail—fine details are hard to carve and easy to slip.
Monoprinting is one-time printing. You apply ink to a plate (glass, acrylic, plastic), draw or mark into the ink, and press paper on top. Only one print results from the ink layer; reinking creates variations, not duplicates.
Process: roll ink evenly onto a plate, draw into the ink using a tool (stylus, stick, brush), place paper on top, apply pressure from the back using a baren or hand, peel back to reveal the print.
Best for: painterly, spontaneous imagery, experimental mark-making, one-off prints. The advantage is immediacy—no planning required. The disadvantage is no repeatability.
Stamp printing requires a pre-made surface with a raised image (commercially made stamp, carved block, natural object like a leaf). You apply ink to the stamp and press it onto paper. Multiple impressions are identical.
Process: roll or pad ink onto the stamp surface, press onto paper, release. Pressure and ink consistency determine print quality.
Best for: repetitive patterns, quick impressions, classroom projects, accessible printmaking. The limitation is that you're limited to existing stamp designs unless you carve your own.
All three methods share one essential: consistent pressure and even ink coverage. Too much pressure = ink seeps under the raised edges and blurs the image. Too little = incomplete inking. Uneven inking = patchy prints.
Start with relief printing using linoleum. Carve a simple design (bold lines, high contrast). Ink once. Print once. See what works and what didn't. The feedback is immediate.
Mixed Media: Combining Materials
Mixed media is the craft of interrogating how materials behave when layered together.
Layering principle: understand how materials interact at the substrate level. Watercolour on paper absorbs and spreads. Acrylic on paper sits on top and doesn't absorb (acrylic is plastic; it doesn't soak into fibres like water does). Marker on acrylic slides because acrylic is plastic. Collaged paper under acrylic paint gets sealed and doesn't lift.
Test before committing: apply medium A to a substrate, let it dry, apply medium B on top. Does B adhere? Does B reactivate A? Does the combination strengthen or weaken the visual effect?
Layering workflow: usually proceeds light-to-dark and transparent-to-opaque. Watercolour under acrylic works. Acrylic under watercolour doesn't (the watercolour won't adhere to the plastic surface). Thin marker under thick paint gets sealed; thick marker over thin paint can bleed through the thin paint.
Adhesion matters: some materials bond well (acrylic to paper, glue under paper), others don't (watercolour to acrylic, marker to glass unless alcohol-based). Plan the sequence assuming each layer must adhere to the previous one.
Collage technique: tearing vs cutting changes the visual. Torn edges are soft and visually recede. Cut edges are sharp and advance visually. Use torn paper where you want integration; use cut paper where you want definition. Paste or glue applied to the back of the collage piece bonds it to the substrate. Different glues have different tack speeds (how long before they set).
PVA glue dries clear and is permanent once dry. Paste is water-soluble and reversible (you can lift a piece if you re-wet it). Glue stick is weak and temporary—don't use it for finished work.
Seal collage under a clear medium (gloss medium or varnish) if you want to paint over it later without lifting the pieces.
Practical Starter Projects
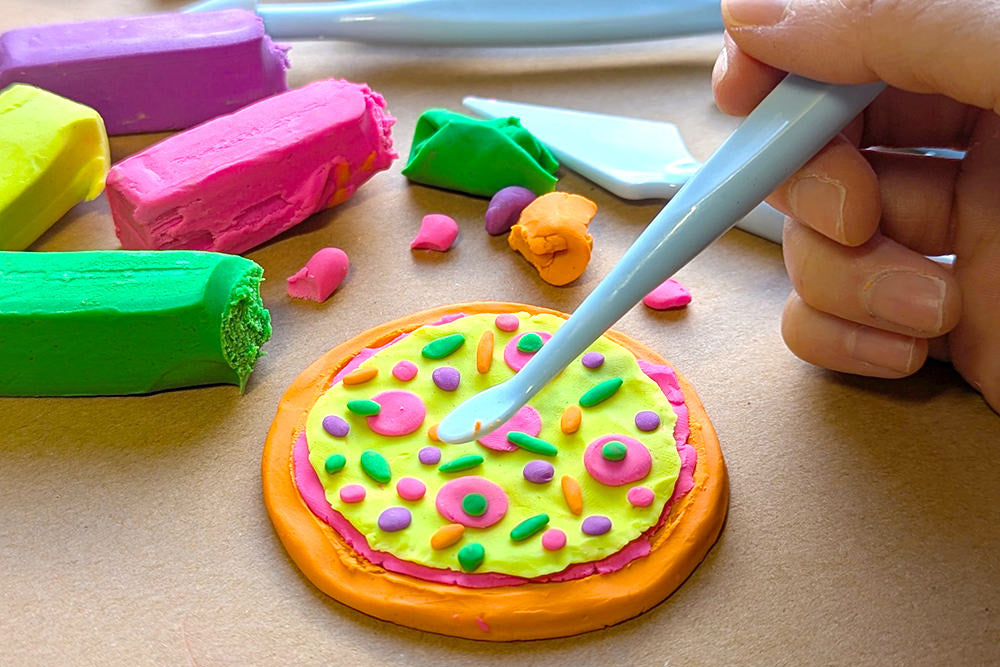
Clay project: textured shallow bowl (air-dry, pinch method)
Roll a ball of air-dry clay roughly 3 inches across. Pinch it into a bowl shape, working from the centre outward, keeping walls even. Once you like the form, stop—you can't add much more without making it fragile. While still workable, press objects into the clay: leaves, forks, stamps. These create texture without adding volume. Cover loosely in plastic for 24 hours. Once dry, you can paint it or leave it natural. Time: 20 minutes active work. Result: functional dish or decorative object.
Marker project: blended landscape (water-based markers on paper)
Sketch a simple landscape (hills, sky, water) with light pencil. Use a cool marker (blue or green) for one area. Immediately use a warm marker (yellow or orange) adjacent to the first colour, overlapping slightly. The water still damp from the first marker carries the second pigment into a blend. Fill the entire landscape this way, working quickly while paper is damp. Let dry. The blends should be soft and painterly. Time: 15-30 minutes. Result: landscape with natural colour transitions.
Printmaking project: simple relief print (linoleum, carving tools, ink, paper)
Sketch a simple design: a leaf, a face, a geometric shape. Keep it bold and high-contrast. Transfer to linoleum using graphite paper. Using a V-shaped carving tool, carve away the background, leaving your design raised. Ink the surface using a roller and oil-based or water-based printmaking ink. Lay paper on top. Using a spoon or baren, apply firm, even pressure across the entire back of the paper. Peel back carefully. The carved areas will be white; the uncarved areas will be ink-coloured. Time: 30-45 minutes (plus drying time). Result: one print you can repeat by reinking.
Mixed media project: collage with acrylic overpainting
Tear or cut coloured papers into shapes. Glue them to a white or light-coloured paper substrate using PVA glue. Once dry, seal the collage with a coat of gloss medium or clear acrylic. Once that's dry, paint over parts of the collage with opaque acrylic paint, letting some collage pieces show through. The medium seals the collage, so the acrylic sits on top rather than lifting the pieces. Once fully dry, you can add details with marker or fine brush. Time: 1-2 hours across multiple drying stages. Result: layered artwork combining collage and painting.
Building Confidence Across Mediums
The underlying principle across all these mediums is the same: understand material behaviour, respect material constraints, and plan your sequence around adhesion and drying time.
Clay teaches you form. Markers teach you colour and surface variation. Printmaking teaches you reproducibility and high-contrast visual language. Mixed media teaches you layering and material compatibility.
Master one technique in each medium. Don't collect mediums; learn them. A dozen mediocre attempts across six mediums teaches you less than three solid projects in two mediums.
Start small. Use air-dry clay for sculptures, water-based markers for sketches, linoleum for relief printing, paper and glue for mixed media. As confidence builds, expand into polymer clay, alcohol-based markers, other printing methods, and more ambitious layering.
The craft is in the doing. Read this once. Then make work.
Ask Klumpf about mixed media, clay technique, markers, or starting a project that uses more than one material. Micador's in-house art expert. Bottom-right of every page.
This concludes the Technique Guides series. Next: "5 Art Techniques Trending Right Now"
© 2026 Micador Group. All rights reserved. This article is original editorial content produced by Micador. You're welcome to link to it or quote short passages with attribution. Reproducing the article in full, or republishing it on another platform, requires written permission — amazing@micador.com.au.

Leave a comment
All comments are moderated before being published.
This site is protected by hCaptcha and the hCaptcha Privacy Policy and Terms of Service apply.